Showing posts with label diy. Show all posts

Wednesday, March 6, 2013

Easter Wreath DIY

Hello, friends! This weekend I was able to enjoy 2 hours to myself while the Mister stayed home with the kiddos and I found myself pushing a cart all through Hobby Lobby looking for Easter inspiration.  I knew I wanted to make a wreath because 1) I'm obsessed with them and 2) my Valentine's day wreath was starting to look silly.  So I found a few things, mustered up and idea and got my eager hands working Saturday night.  This is what I came up with:


It has a lot of symbolism to me, personally.  I liked that this type of wreath looks a little like what we see as a crown of thorns in Elementary school passion plays.  I also liked that it looked a bit like a nest which is very spring-like.  I liked the purple flowers because purple is such a big color during the Easter pageantry mostly symbolizing Christ as the King who has conquered the grave (can I get an amen?).  And purple is another great spring color.  Then there's the cross representing, duh, the cross!  And the paper I used on it I wanted to look like text from the Bible.  I personally love it and am quite proud of it!

Would you like to make something similar?  I took pics along the way to form the tutorial below in case you do.

The supplies:
- Branch like wreath
- Stem of purple flowers
- 1 piece scrapbook paper
- 1 piece cardboard
- 1 glue stick
- Scissors
- Hot glue gun


First you'll make the cross.  I drew a cross shape on my cardboard as a reference when cutting.  You could use a stencil if you're technical and not rushed, of course.  Then, I used a glue stick to glue the entire scrapbook page to the back of the cardboard.  I actually did this before bedtime so it'd be good and dry for cutting.  I left it drying about 30 minutes total.  Then, I cut along my outside outlines for the cross and trimmed up from there until it was just the shape I wanted.  Pretty easy!


Next up, I cut the flowers from their stem.  I paid a little more for my flowers (the stem was $6 but I used a 40% off coupon to justify the price) because the stems were wire on bottom, but loose up top for a more natural look.  I didn't have wire cutters so I knew this would be important when it came to just using scissors.  I snipped them all up in varying lengths and then wove them into one side of the wreath.  I had to tuck some under branches in certain places to make them not stick out.

Sorry these pics are blurry!
And finally, I hot glued on my little cross and was done!  I ended up attaching a thin white ribbon to a secure branch on the wreath to hang on my door's nail.  If you have a wreath hook it should work fine, but I'm using a nail so it wasn't just going to stick there!  The pic below is pretty bad and the light is weird, but I'm throwing it up so you can see the ribbon.


Happy Easter, y'all! 

Wednesday, January 16, 2013

Valentine's Day Wreath

Well, it's been awhile and we're one house full of sick people feeling quite cooped up!  Consequently, I've taken some (of the little) free time I had this weekend between wiping snotty noses and snuggling sleepless, coughing babies to make a little wreath.  I posted the picture on Instagram and a few friends asked if I planned to blog it.  So I decided, why not?  My blog needs a little love and maybe your door needs a little Valentine's day pizzaz.


So this is my wreath!  It was pretty simple, just time consuming.  You'll need what's listed/identified above plus a styrofoam wreath, plenty of hot glue, a glue stick, and tape!

1 --> Start by wrapping the twine around your wreath.  This takes me close to two hours and fortunately when I set about to decorate the wreath I already had the wrapping done.  I highly suggest getting cozy on your couch and wrapping while watching some good TV during nap time or after bed time.  To hold my wrap I actually don't glue the start point, I just tie it to the wreath.  This is mostly because I'm sitting on the couch and feeling lazy.

2 --> When you're done wrapping, hot glue your finally twine wraps in place and check for open spots.  I wrap quickly, so I always notice a few places were styrofoam is peeking out at me mocking after.  So I take those spots, rewrap them and glue them.  

3 --> Next, I made the banner.  This part was so easy.  I just cut a few triangles until I got the size I liked.  Then I used it as a template to cut 3 more.  Then I cut another bigger triangle and used it as a template.  I wrote "L" "O" "V" "E" on each small triangle in my cursive handwriting and then used a glue stick to glue them to the big triangles.  

4 --> Then, I cut a big piece of white ribbon I had on hand from Christmas and centered the triangles on the ribbon.  I flipped them over and then just taped the ribbon to the top of the triangles toward their tops.  I use tape because I tried glue and just made a mess of things.  Tape is easy and you can cut off any overhang.

5 --> Next, lay your ribbon on your wreath and figure out how you want it to hang.  Then glue and snip!

6 --> Almost done! Now, the roses.  I made these using red felt that was 3/$1 in the craft section and I didn't even use a whole sheet.  I just cut strips (long ways), glued, and twisted and voila - felt flowers!  Now, I've been doing felt flowers awhile.  They're the only fabric flower I've figured out thanks to a few tutorials I watched/read in the past.  I have no idea which tutorials I used so I made one for you that's nice and short if you are interested.  My husband said I should not use this video because I shot it on my iPhone reverse cam so it's bad quality and my kitchen counters are dirty and did I mention my kids were sick so I look a little terrible... but I'm going to anyway.  Mostly because I just don't want to refilm.  Please don't laugh at me.  ;)

...And I was going to put the video here in an embedded format, but it's not working on my blog for some reason!  So here is the LINK to YouTube ---> http://www.youtube.com/watch?v=jcK9wU9k49g&feature=youtu.be

7 --> Finally, using loads of hot glue, glue your flowers onto your wreath.  I practice placement before gluing so I know kind of what the finished product will look like.  :)


So there you have it!  A Valentine's Day wreath of love!  I really like it and am enjoying knowing it's on my door.  Now if only we were leaving the house more often so I could actually see it...


Friday, October 5, 2012

Fall Decorating

Good morning, friends & happy Friday!!! 

I'm enjoying the "31 days" series very much, but I want to make sure within the mix I'm posting other things I enjoy as well!  So today in lieu of a lengthy WDW post, I'm posting pics of my fall decorations!  

I think the 31 days is open to interpretation is great and for these 31 days of October I will be posting frequently about WDW, but I don't know if in the end I'll have 31 posts just about that -- especially because I don't like to post on the weekends typically.  ANWAY...

This is my fall mantle!


Josh & I have been married 4 years now and homeowners for 3.5 years, but this is the first time I've EVER decorated for fall!  I actually didn't even have a single "fall" thing except a few things I'd bought 90% off at Hobby Lobby that I didn't really love anymore.  We're pretty strict in our budgeting (because we have to save for Disney World trips, lol) and I knew I couldn't just walk up to Josh and tell him I intended to spend x amount of money to decorate.  Because he wouldn't care and he'd then want to spend x amount of money on video games or something.  So, instead I devoted my allowance (we each get $40 a month) to getting little bits and pieces and told myself to love what I had first (all part of this "live simply" endeavor!) and then pick up a few things.  And you know what?  I spent less than $1 for my mantle/wreath/and mirror banner (excluding the candle which was $5 at Target).


The wreath above was simple enough to make but time consuming.  Wrapping those things takes forever!!! I had actually started wrapping the wreath to make it 4th of July themed but didn't finish in time.  I ended up running out of twine just over half way through the process and didn't want to buy more because I knew stopping mid-project meant I might not have time to ever pick it up again.  I had already planned on using scrap fabric from J's baby quilt to make rosettes, but I opted to glue on some other fabric and I think it looks pretty good and intentional (and so did everyone I asked on Twitter and Instagram - thanks, friends!).  The rosettes are so easy to make, they just take time.  You basically cut a strip of fabric, twist, hot glue, twist, hot glue, twist, hot glue... And that's it!  The whole wreath took me about 2 hours and about an hour of wrapping in July.


I had baby clothes pins lying around so I bought this cute chevron scrapbook paper half off at Hobby Lobby to cut and hang.  I liked the way it turned out so simple and shabby chic.


This was super simple and was actually done when J woke up from his nap so we had a lesson in triangles.  ;)  I just cut them and taped them to yarn and hung it up on the mirror.


I found this "T" at a thrift store for $.25 and was SO thrilled because buying letters is expensive!  I wrapped it in yarn one night while my husband got caught up on Revenge season 1 and then wrapped it with the yellow/orange yarn to make it pop more against our brick.  I used felt to make the rosettes and voila! 


Last weekend we went to Target as a family and they had so many great things clearanced!  I had been eyeing all the pieces in this beautiful collection all summer and have always loved this!  It was $15 originally and the first time I saw it clearanced it was still $10.  Saturday I picked it up for $4.50 and it happily is sitting on my table holding some apples.  Our table is small so it's the perfect size.  I also picked up this frame for under $4.  I'm always picking up frames on clearance, in thrift stores or at garage sales.  I love pictures everywhere, but hate paying high prices.  I have a plan for the frame, but haven't had time to work on it because I have a little man's 1st birthday party to work on these days!

So do you decorate for fall?  I love having more time to do things like this now that my boys are getting a little older and napping a little better and allowing me to do more chores in the waking hours so I can take more "me" time at naps and night.  

Monday, August 6, 2012

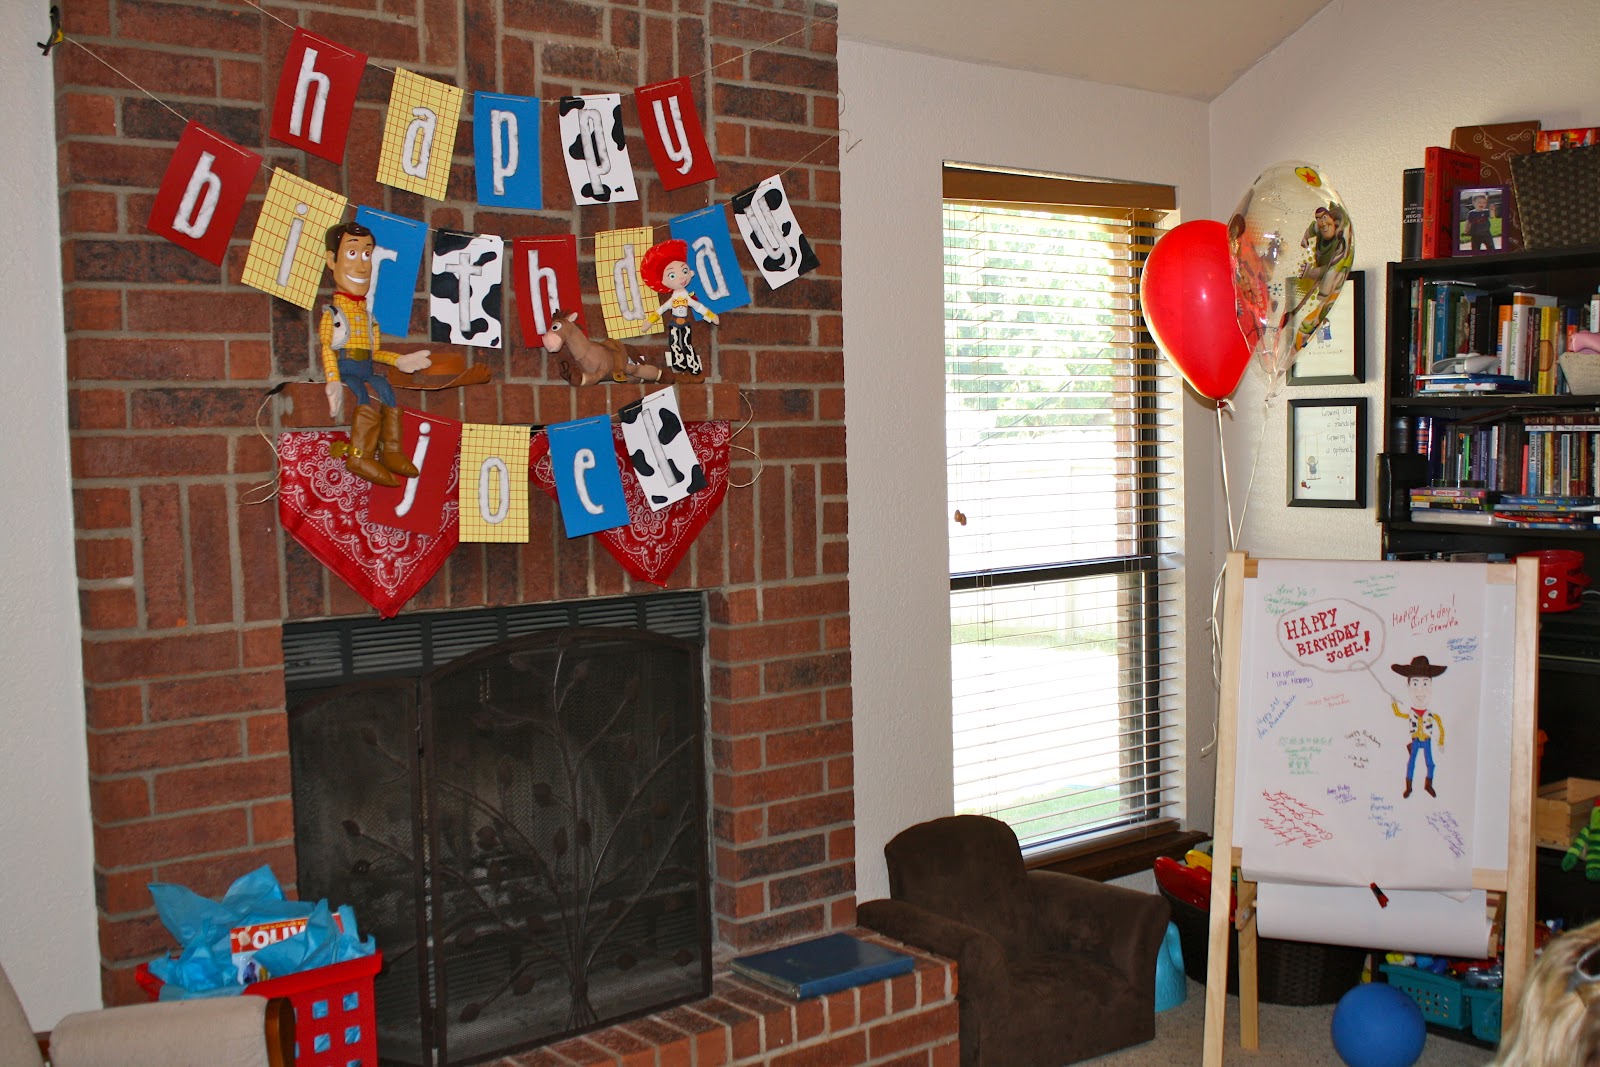
A Toy Story 2nd Birthday Party

I've spent the last few weeks working on J's 2nd birthday party.  It was this last Saturday (even though his birthday is tomorrow).  If you didn't know he is OBSESSED with Toy Story.  We watch it every day (and boy am I glad there's 3 to choose from!), he plays with his Toy Story toys all the time and is always asking about Woody's hat.  I was excited to have this party for him & to see his reaction to everything we set up.  He was definitely excited when he walked into Grandma's house and saw everything, but let's be honest, the balloons were by far the highlight of the decor.  Haha.  Oh well, I've packed it all up and intend to reuse it again when he's older and will appreciate it even more!

We had two parties with him with our two separate families.  This first batch of pics was with my family at my Mom's house (our house is too small to hold all the people who came to this one!).

(The easel was a gift from my parents and my youngest brother drew the Woody. Everyone at both parties signed.  This was my Mom's idea & I loved it!)


Most of my time spent crafting was on this photo booth.  I saw the idea on Pinterest and loved it but wasn't sure how it'd pan out.  It ended up being so much fun for everyone and the pictures are incredible!  I'm so glad I ended up taking the time to do it and thankful to my sister who helped me with the props!


Special thanks to my husband who helped so much w/ the party & who dealt w/ a crazy woman as a wife last week.  ;)
Party two was at our house with Josh's family.  It started immediately after J's nap & he was pretty excited to wake up and see the party as still happening and his Nana & Pa had arrived for the fun!  My Mother-in-law contributed a few more decorations she picked up at Party City.  My favorite things were the giant Woody & Buzz and Jessie, Rex & Mr. Potato Head posters she brought.  J was impressed too.  They're now hanging in his room and spicing up his plain white walls.  Here's a look...


I'm typically not a fan of posting my kid's names or pictures on this blog, but since this is a birthday post here's a picture of the little man from the side admiring the large Woody poster during his second party.  I really can't believe he'll be two tomorrow and I've just celebrated that with the people who love him.  Time really does fly way too fast when you become a parent.  :(


Thanks so much for everyone who helped with the party! I'd like to put up a few tutorials soon, but in the mean time here's links to websites I drew my Pinstert-piration! 


E turns 1 on October 15th and I'm already planning (and pinning) the best Mickey Mouse Clubhouse party for him (he LOVES Mickey!) but I think everyone around me deserves a birthday party break.  We go to Disney World soon, but once we're back I'll switch over to party planning mode for my littlest man.  Hope you all have a good Monday! :)

Thursday, June 7, 2012

Pin Review: DIY Miracle Pan Cleaning Solution

So it's been awhile! I'm always trying to find that balance of making time for things I enjoy - like blogging - and the other things I have to do every day (changing 8-10 diapers, feeding kids, cleaning up messes constantly, never ending laundry, playing with the babies... you know, life stuff!).  That being said, I started this blog as a creative outlet and I'm ready to get back on track!  I've tried a few new recipes, done some new DIY projects, and have reviews of a few pins ready to share with you guys!

Today I will review a pin.  This is a new concept for this blog, but as someone who loves Pinterest and is always anxious to try new things out, I'm always leary of investing time or resources into something that may not work or a recipe that may not be delicious or a craft that may not be so easy.  I'm always skimming comments for reviews (if you've tried any of my recipes so far and have time to review, I'd love for you to leave a comment on the recipe you tried to review it!) before I do something but sometimes that's just not available.  So, I'm starting this new "series" called where I talk about doing something I pinned (because I do TRY to do some of my Pinterest pins - especially the recipe ones!).

So here we go!  For my first time doing this, I want to bring you a pin review of a pin I didn't like.  The link to the pin is HERE.  And the pin's image looks like this:


I decided to try this pin out last night after the Thunder game because I was riding the high of our win and wanted to... clean.  I'm crazy like that.

Now I didn't take a before picture of the pan I used because I didn't think about this starting this series until this morning.  Whoops.  I will say the pan I used didn't look a whole lot different than it does now which is why I'm giving this pin a negative review.

I don't doubt AT ALL that this blogger's pan ended up looking like that and that this worked for her, but it didn't work for me.

I did just what she said: I dusted on baking soda (pretty thick), layered on hydrogen peroxide and then coated in more baking soda.  It sat out from about 11pm-7am so a full 8 hours.  I was excited to scrub it off this morning (and I was all about scrubbing - she said she did NOT scrub) with a dishcloth but it hardly looked any different to me.  There were a few spots that were cleaner and the film on the pan was gone (which is definitely a plus!) but my pan didn't look like that all.  It looked like this:


If you look closely at the pan you can see a circle around the Chefmate imprint that looks lighter than the rest of the pan.  That's about all the change I noticed aside from the film being gone.  The areas that were really bad (like towards the back of the pan) stayed pretty bad.

SOOO... In my experience, the tip in this pin did NOT make my pans look new or cleaner, but it DID lift the film that can be so tricky to get off from layers and layers of PAM.

So I'm curious, have you tried this?  Did you let it soak longer or use a scrubber to take off the soda/peroxide mix?  If you had better luck, please share with us all!

Next time I do a pin review it'll be for something I DID like.  Because no one wants to hear over and over again about how things don't work, right?